Integrating Machina Pazrt Clipart Element Brush into Your Creative Workflow
In the fast-paced world of digital design and content creation, efficiency is not just a preference; it is a necessity. Whether you are a freelance graphic designer managing multiple client deadlines, a small business owner handling your own marketing materials, or a hobbyist looking to elevate your personal projects, the assets you choose can significantly impact your output quality and turnaround time. The Machina Pazrt Clipart Element Brush represents a strategic resource for creators who need high-quality, versatile visual elements that integrate seamlessly into existing workflows. Understanding how to leverage this digital product effectively requires more than just downloading files; it involves planning, organization, and a clear understanding of where these assets fit within the broader scope of your creative process.
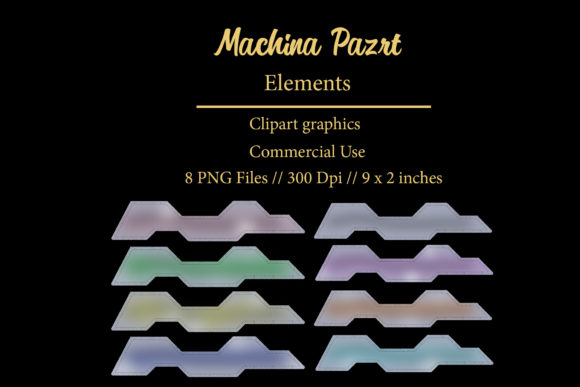
Understanding the Asset Specifications and Quality
Before integrating any new asset into your workflow, it is crucial to understand its technical specifications. The Machina Pazrt Clipart Element Brush package is designed with professional standards in mind. Upon purchase, you receive a compressed .ZIP file containing eight individual transparent PNG elements. These are not low-resolution web scraps; they are high-fidelity images rendered at 300 DPI (dots per inch). This resolution is the industry standard for print production, ensuring that your designs remain crisp and clear whether they are viewed on a retina display or printed on physical media.
The dimensions of each element are approximately 9 x 2 inches. This specific aspect ratio offers flexibility. It is wide enough to serve as a header, a footer, or a decorative border, yet compact enough to be used as an accent in smaller layouts like business cards or stickers. The transparency of the PNG format is perhaps the most critical feature for workflow integration. It allows you to layer these elements over any background color, texture, or photograph without the need for time-consuming manual cutouts or background removal tasks. This immediacy saves valuable hours during the execution phase of a project.
Pre-Production: Preparation and Organization
Successful implementation begins before you even open your design software. When you download the .ZIP file, the first step in your workflow should be extraction and organization. Do not leave the files in your downloads folder. Create a dedicated directory within your asset library, perhaps labeled "Machina Pazrt Elements," and extract the eight PNGs there. Naming conventions matter. If the files come with generic names, consider renaming them based on their visual characteristics or intended use cases. This simple organizational habit reduces friction when you are in the middle of a creative session and need to locate a specific element quickly.
Consider the compatibility of these assets with your primary tools. Since these are standard PNG files, they are universally compatible with Adobe Photoshop, Illustrator, Canva, Procreate, Affinity Designer, and most other graphic design platforms. However, knowing how your specific software handles layer blending and transparency will help you plan your approach. For instance, if you are using a platform that supports smart objects, you may want to import these elements as such to maintain non-destructive editing capabilities. This preparation phase ensures that when inspiration strikes, your technical setup is ready to support immediate execution.
Integration Across Diverse Projects
The versatility of the Machina Pazrt Clipart Element Brush allows it to function at various stages of different project types. Its application is not limited to a single niche but spans across print, digital, and merchandise design. Here is how these elements can be integrated into specific workflows:
- Printed Planner Goodies and Stationery: For educators and productivity enthusiasts, these elements can serve as decorative headers in weekly planners or as functional dividers between sections. Because they are 300 DPI, they print sharply on standard home printers or professional offset presses. You can layer them over pastel backgrounds to create a cohesive aesthetic for printable journals.
- Stickers and Sublimation Designs: The transparent background makes these elements ideal for sticker creation. You can place them on colored vinyl sheets or use them in sublimation designs for mugs and T-shirts. The 9 x 2 inch size is particularly useful for creating wrap-around designs for cylindrical objects like tumblers, where the element can act as a central focal point or a repeating pattern component.
- Business Cards and Logos: While these are clipart elements, they can be incorporated into larger logo compositions or used as secondary branding elements on business cards. They add a unique visual flair that distinguishes your brand from competitors using generic stock icons. Ensure that you adjust the opacity or blend mode to harmonize with your brand colors.
- Web Decor and Blog Graphics: In digital marketing, visual consistency is key. Use these elements to frame blog post titles, separate sections in long-form articles, or create eye-catching social media banners. Their lightweight PNG format ensures they load quickly on websites, contributing to better user experience and SEO performance.
Execution: Practical Implementation Tips
When you are in the active design phase, the way you manipulate these elements can determine the final quality of your work. Start by considering scale. Although the original size is 9 x 2 inches, you can resize them down for subtle accents or up slightly if needed, though keeping them near their original resolution is best for maintaining clarity. Avoid stretching the aspect ratio disproportionately, as this can distort the visual integrity of the brush strokes.
Layering is another critical technique. Do not simply place the element on a white background. Experiment with multiply, overlay, or screen blend modes to interact with underlying textures or photographs. This creates depth and makes the element feel like an intrinsic part of the composition rather than a sticker slapped on top. For example, if you are designing a fabric pattern, duplicate the element, rotate it, and arrange it in a grid or scatter pattern to create a seamless textile design.
Color customization is also possible depending on your software. While PNGs are raster images, you can use clipping masks in programs like Photoshop to change the color of the element to match your specific project palette. This ensures brand consistency across all your materials, from invitations to advertising banners.
Quality Control and Consistency
As you scale your use of the Machina Pazrt Clipart Element Brush, maintaining quality control becomes essential. Always preview your designs at 100% zoom to check for pixelation or jagged edges, especially if you have resized the elements. For print projects, convert your final document to CMYK color mode to ensure that the colors you see on screen match the printed output. Digital projects should remain in RGB.
Consistency extends beyond individual projects. If you are building a brand identity, establish guidelines for how these elements are used. Define standard padding, preferred background colors, and acceptable modifications. This creates a recognizable visual language that your audience can associate with your work. Document these rules in a brand style guide, which serves as a reference for future projects or for other team members who may collaborate with you.
Long-Term Value and Workflow Efficiency
The true value of purchasing a digital product like this lies in its reusability. Unlike custom commissions that are one-off expenses, this clipart set is a permanent asset in your library. Over time, the cost per use decreases as you deploy these elements across dozens of projects. This contributes to long-term workflow efficiency. You no longer need to search for suitable graphics for every new task; you have a reliable, high-quality resource ready to go.
Furthermore, using pre-made elements allows you to focus your creative energy on higher-level decisions, such as layout composition, typography, and messaging. By outsourcing the detailed illustration work to assets like the Machina Pazrt Clipart Element Brush, you streamline your production pipeline. This is particularly beneficial for entrepreneurs and marketers who must balance creative output with business strategy. It enables you to produce professional-grade materials without the steep learning curve of advanced illustration techniques.
In conclusion, integrating the Machina Pazrt Clipart Element Brush into your creative routine is a practical step toward enhancing both the quality and efficiency of your work. By understanding the technical specifications, organizing your assets properly, and applying strategic design principles, you can unlock the full potential of these eight transparent PNG elements. Whether you are creating sublimation designs for merchandise, polishing up business stationery, or adding flair to digital content, these tools provide the flexibility and professionalism needed to succeed in a competitive creative landscape. Treat this digital product not just as a collection of images, but as a foundational component of your streamlined design workflow.